| Tech 2 Land Units | ||||
|---|---|---|---|---|
| Heavy Bot | ||||
| Heavy Tank | ||||
| Amphibious Tank | ||||
| Mobile AA Flak Artillery | ||||
| Mobile Missile Launcher | ||||
| Mobile Defense | ||||
| Other | ||||
| Engineers | ||||
|---|---|---|---|---|
| Tech 1 Engineer | ||||
| Tech 2 Engineer | ||||
| Tech 3 Engineer | ||||
| Tech 1 Engineering Drone | ||||
| Tech 2 Engineering Station | ||||
| Tech 3 Engineering Station | ||||
| Other | ||||
 | |
| Build costs | |
|---|---|
| Storage | |
| Consumption | |
| Build rate |
|
| Max health | |
| Speed | 3 (AmphibiousFloating) |
| Veterancy |
|
| Intel (radius) | Vision: 20 Radar: 30 |
Weapon: Hells Fury Riot Gun Direct Fire - Projectile |
|
| Damage per second | 30 |
| Projectile damage | 15 |
| Rate of fire | 2 Projectiles/s |
| Range | 18 |
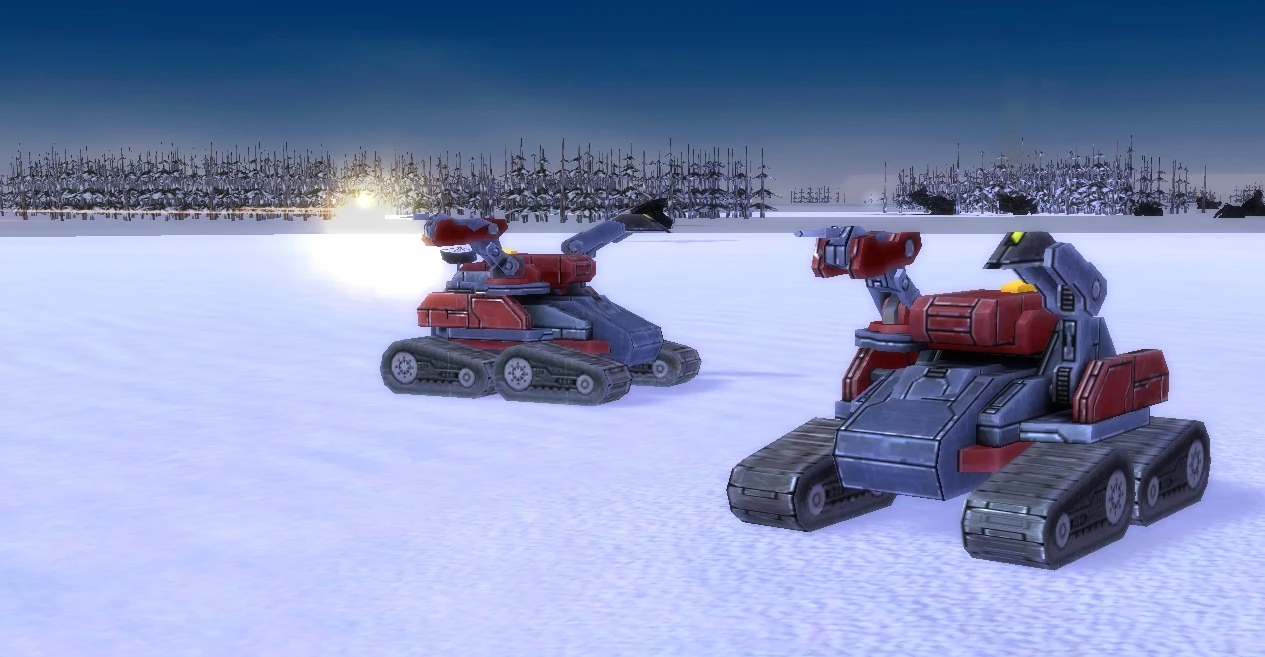
The UEF T2 Field Engineer, nicknamed the Sparky, is a UEF unit. It is an engineer oriented around constructing defenses and clearing reclaim.
The Sparky has been made more suitable to the front line than standard engineers, with many useful adaptations for the battlefield. Firstly, it moves considerably faster than any engineer, allowing it to be more responsive to orders as the situation and enemy movements change. Secondly, for its survivability it has more HP than a normal T2 engineer (although still less than a T3 engineer) and it also includes both radar and jamming systems. Finally, it mounts a direct-fire Hell's Fury Riot Gun, which can be fired while not actively constructing and allows it to defend itself from light T1 enemies.
The drawback to these improvements for efficiency in combat is its limited schematics in its engineering suite, being restricted to defensive structures at T1/T2, such as the Triad PD. Though they will frequently be traversing the map to advantageous positions, they notably cannot claim new mass deposits nor produce radar and are thus no substitute for standard engineers mobilised by transports. However, once the engineers meet, the Sparky can reclaim or assist other construction at full speed for T2, just as quickly as any other T2 engineer.
Tactics[]
While the UEF ACU with T2 Engineering can accomplish much of the construction role of T2 PD and turrets, that by no means makes the Sparky useless or obsolete. Firstly, there is only one ACU and it is slow, while Sparkies are fast and many, and can be quite useful for map coverage and obtaining remote reclaim. They are also useful for upgrading existing mass extractors and protecting them with T2 tactical missile defense against TML.
Keeping a few of these units with your main army gives them defence against small fast moving units, thanks to their high rate of fire. Its presence also increases durability from the radar jamming it provides, as well as repair capability. As for its constructions, T2 PD can both protect the army from units with a shorter range than it, while the shield, AA, and TMD further increase durability. Additionally, after a victorious encounter, you can make up for the lost mass invested in destroyed units easily by reclaiming remains of enemy and friendly units much more quickly. Overall these units are very useful combat assistants and worthy of being added to the production cycle of a UEF T2 factory.
Regarding its jamming, it can really mess up point defences, as the PD will aim randomly and often target units that are not there, lowering their effective DPS. This effect can help you set up a defensive point, build structures to help get a base up on that point and repair those structures during and between fights.Note that jamming is useless if the unit is close enough to be seen by vision or spotted by air scouts, which will remove the jamming signatures while the Sparky is spotted.
The Sparky at T3[]
Despite their limited engineering suite, just like any other engineer, the Sparky can still assist a more advanced unit such as the standard T2 or T3 engineer or, even better, a UEF SCU. Combined with the SCU's shield dome upgrade, 3 or 4 Sparky's can allow you to build a very powerful firebase under heavy fire in mere seconds, and also rapidly destroy most of the small-yet-fast groups that an enemy might send out to try to stop you, should you not have time to deploy PDs first.
In addition, a group of 6-10 Sparky's is an excellent choice for assisting a Fatboy, capable of providing close-range fire support against any enemies that manage to survive the Fatboy's artillery, as well as supplementing the Fatboy's already impressive build rate while remaining under its protective shield.
Once T3 units become pervasive, the combination of a Fatboy, an SCU, and multiple Sparky's can increase the survivability of the entire group due to overlapping shields from the SCU and Fatboy as well, creating a nearly invincible forward base unless your opponent is willing to commit considerable resources to destroying them. (Note that while such a formation can take on most Experimental units, if the enemy has an Ythotha on the attack, the best option is to retreat to avoid being fried by its residual energy signature if it is destroyed and blown up by its large arsenal if not.)

Two UEF Field Engineers with one firing its riot gun