Preface[]
This tutorial will help you put a map together for Supreme Commander using image editing tools and HazardX's Supreme Scenario Editor (beta).
Note: You can edit both height- and texturemaps with the Supreme Scenario Editor (thanks for making all this possible!). This approach shown here gives you more control and reusability.
Needed for this[]
- Supreme Commander
- HazardX's Supreme Scenario Editor
- Photoshop (or anything in that range)
- Nvidia DDS-Plugin
Assumptions to do this yourself[]
- you are experienced in image editing
- you are able to handle layers and channels as well as levels and image modes
- you having a pretty clear picture of your future map in your head or on paper
- you can keep organized :)
Used abbreviations[]
- SSE = HazardX's Supreme Scenario Editor
- PS = Photoshop
- SupCom = Supreme Commander
Preparation[]
Prepare files in SSE[]
As both SSE (beta) and PS are demanding on the memory, refrain on working in both at the same time.
If you keep SSE open, minimize it, it will stop the drain on the resources.
- open SSE
- make a new level in desired size
- export heightmap (name it "heightmap_export.raw")
- export texturemap (name it "texturemap_export.dds")
- export preview (name it "preview_export.dds")
- close SSE
Prepare files in PS[]
- open PS
- open "heightmap_export.raw" (1 Channel, 16 bit, IBM PC)
- new file, RGB Grayscale, same dimensions, save as "heightmap_master.psd"
- open "texturemap_export.dds" (RGBA, default sizes, mipmap off)
- new file, RGB Grayscale, same dimensions, save as "texturemap_master.psd"
The preview will not need an master, so we leave that
Check if "texturemap_export.dds" really has an "alpha1"-channel, if not, add it by hand
You have now 4 files open, 2 exports, 2 masters - good for start working
Heightmap[]
Editing heightmap[]
Normally we work on just a fraction of the available levels.
That the heightinformation is readable to us, we will blow that fraction (see picture).
We use an action to crush the levels for export (described later).

This is how we keep the heightinformation readable to us while editing.
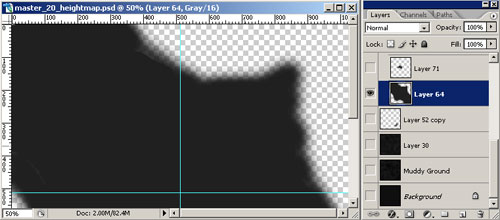
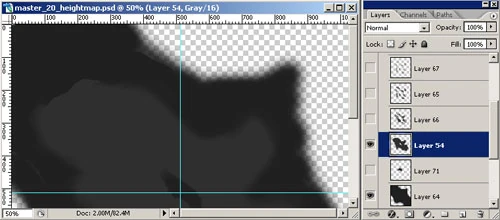
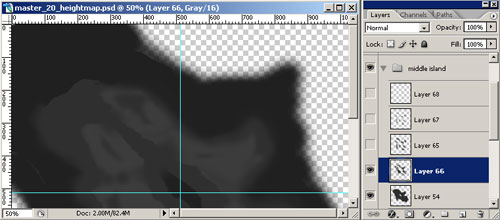
Manage your mountains, fjords etc in folders, that you can move or copy them if needed.
This example shows a setup with just 5 height-layers, for simplicity.
Now we start our way up from the lowest level, one by one. Remember to start this with a clear plan in head or paper.
This level will be just below the water level - for nicer beaches.
- layer in example is rgb:31
- done by lasso tool, then work on the egdes with a blurry erasor (large size, low flow)
- if you have islands, here they become their basic shapes
This level is just over the water level.
- layer in example is rgb:47
- fill the hole map for land maps, and do holes in it for lakes
- test the levels (with proper export to SSE, see below) in SSE, adjust levels if needed
This is the first higher level, containing some cliffs.
- layer in example is rgb:60
- do cliffs with an erasor (art-brush, 17px), high opacity and flow

Starting to define mountains here, also have some cliffs, or joining other levels cliffs.
- layer in example is rgb:66

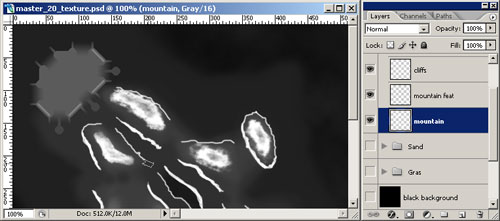
Working on mountain here.
- layer in example is rgb:91
- to get some features here, use artbrush 17px to do some noise on the mountain (low flow)

Top of mountains added and added the bottom of the sea.
- layer in example is rgb:135 (mountain top), rgb:12/25 (seafloor)
- bottom of the sea done by render clouds with two low level colors
Now you have defined you basic layers and worked on their egdes. Their color reflects their altitude. Be sure to test your edits, adjust with brightness on the layer in question.
Export Heightmap[]
- select all and copy merged on master, paste in to export and save
- for proper heightmap export, an action is needed (for same output every time):
- Flatten Image
- Brightness -10 & Contrast -80 (my values)
- Save as "heightmap_export.raw" (1 Channel, 16 bit, IBM PC)
Ensure proper settings in your export-action early.
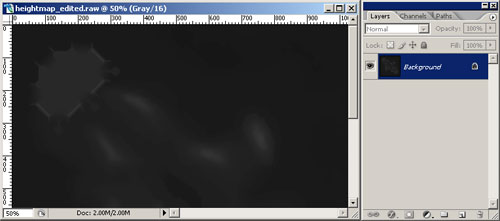
This is how the export looks with adjusted levels.

This is how the import in SSE will look like, water level still needs to be set.
Keep height- / texturemap in sync[]
After each greater edit on the heightmap, do following:
- select all and copy merged on "heightmap_master.psd"
- new image, paste contents
- resize to new size -> (size-1)/2 (ie. 1025 (heightmap) -> 512 (texturemap) etc.)
- copy contents to "texturemap_master.psd", call the layer "heightmap matching"
- close the temporary image to free memory
Use it for correct placement of your textures.
Texturemap[]
Edit texturemap[]
Be sure to have all major features set in the heightmap, before starting with the texture map.
First we have to decide on how those 5 textures on the map shall be used. Basic textures as grass, sand, stone are mostly needed.

In SSE RGBA-channels are distributed like this (Layer1: default, L2: R, L3: G, L4: B, L5: A). RGBA: R lowest proi -> A: highest texture prio
The layer 1 cannot be edited and paints everthing lacking any other texture.
In PS, start doing folders for each of the definable 4 (RGBA) layers on the "texturemap_master.psd". Name them "Grass", "Stone" etc for easy access, you can switch the visibility off on the folder you are not working on.
If you have a layer you like to paint over others, you have to copy it on a later of the RGBA-channels of the export. Switching channels in PS also means picking new textures in SSE.
Work just with white and opacity for simplicity (not like on heightmap).
Levels below 50% opacity will fail to been shown at all
Only paint those areas with more then one texture at a time where its really needed

With the heightmap matching and the edited channel on 20% visibility, helps working on it.
Use of artistic brushes helps to get a natural effect.

Grass channel on full view, notice the heightmap matching is still visible in the back.
Working on the cliffs and the mountains, has to be checked in SC for best placing.
- now work on each of the texture channels until you have you desired results.
Export Texturemap[]

"texturemap_master.psd" Grass folder visible, black background (note: textures organized in folders)
- you have to hide the heightmap matching and have a black background
- just make of one of your four texture-folders (ie. Grass, see above picture) visible
- copy merged and paste into the target channel (ie. Red, see below picture) of "texturemap_export.dds"
- repeat this three times for the remaining channels

"texturemap_export.dds" Red channel selected (note: textures organized in channels)
- now save "texturemap_export.dds" (CTRL+S) without changing the DDS-settings (8:8:8:8 ARGB (32 bit)).
Setup[]
Finish the map[]
- export, save masters and close PS (recommended)
- open SSE and open the map
- import height- / texturemap
- set textures and waterlevel, test in SupCom with proper conditions
- if not satisfied repeat steps 3 thru 5 until satisfaction is clearly present
- set markers, props, decals
- edit infotext
- save map
- close SSE
- test in SupCom and dont forget the screenshot for the preview (all zomed out)
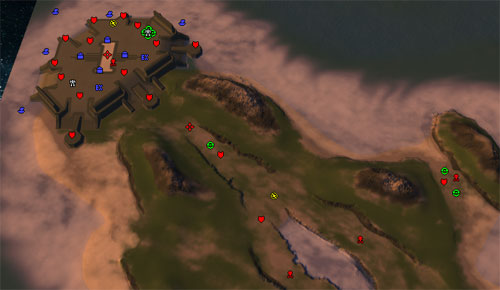
SSE - markers set on the map.
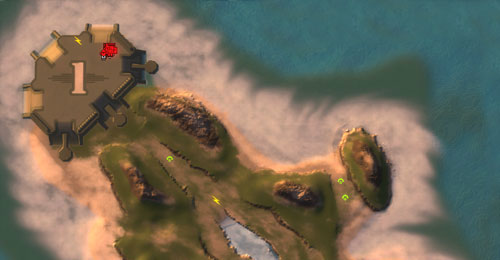
SupCom - this is how it may turn out 8)
- open "preview_export.dds" and paste screenshot, fit map into picture and save
- import "preview_export.dds" into SSE, check in SupCom if OK
Quality management[]
Consider the following prior to release
- no mechanical problems (ie. stuck units etc)?
- even layout for every player?
- mex / energy distribution ok?
- AI markers set and tested?
- no bigger texture glitches and texture aligned to heightmap?
- normal maps for textures properly set?
- map-description and preview ok?
- some screenshots to post with release taken and uploaded?
- all intended routes accessable for the biggest unit (ie. fat boy)?
- does preview match the start positions in the game lobby?
- readme done with credit to all sources & testers?
Good luck with your own map!