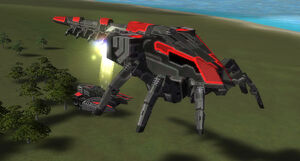
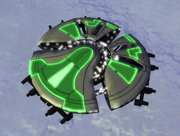
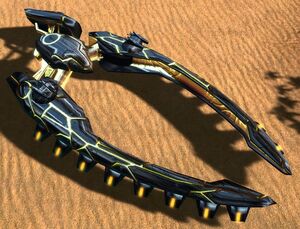
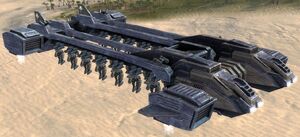
| Transport units | ||||
|---|---|---|---|---|
| Tech 1 Light Air Transport | ||||
| Tech 2 Air Transport | ||||
| Tech 2 Gunship | ||||
| Tech 3 Heavy Air Transport | ||||
Transport units are capable of carrying land units around, moving them quickly through the air to the destination. They can load, unload, ferry and assist. As a non-combat unit, their key attributes are capacity, speed, durability, and cost – particularly in energy.
Transport capabilities are commonly employed for one of the following purposes:
- drop offensive units at an advantageous position, such as behind the enemy
- get units to a location faster (this might be away from a factory towards the battlefield, a mass deposit, or other areas of interest)
- move units across impassable terrain such as water, or up to cliffs
- evacuate ACU or other critical units from a dangerous location
Transport-specific orders[]

The Cybran Skyhook Tech 1 Light Air Transport loading a Rhino.
Transport[]
The most direct command, but with a multitude of options. This command is represented with a purple bowl with an arrow directed into the top. Units can be ordered into the transport, or the transport can be ordered to pick up a unit using this command. When using the command again the transport is commanded to drop all units off at point B, simply targeting the command at a location. Then all currently loaded units will be unloaded. Supreme Commander has the unique functionality that if a transport and land units are selected simultaneously when the transport command is issued, the transport will automatically load the units on the way to the transport destination, making them arrive faster. However, it will not go back to help a second load of units without being issued an additional command.
All of these options can be combined with other orders by use of the shift key, and it is advisable to do this combination so to keep the transport moving and out of danger. It is usually much rarer to have a transport do multiple pickups rather than multiple dropoffs, but with shift commands this is also possible.
This one-way usage is common for taking an advantageous position, such as bypassing the bulk of slow enemy forces or other defences (like turret structures), especially in multiplayer. It can also be used to transport engineers to far away mass extractors on particularly large maps.
Unload[]
This is not explicitly on the command card, but by clicking off a specific unit from the selection UI, this will start an offloading command (with the same icon as Transport) which must then be targeted. When queued with shift this can be done at different locations. Individual units thus be spread out, allowing placement of the units at multiple and sequential drop zones, say points D, E, and F, without the need for multiple transports.
As with the transport command, the transport must be manually ordered back to a safe location to pick up more units, and shift is useful to queueing this move command.
Ferry[]
- See Ferry for more information.
Ferrying is the act of creating an automatic transport route. By setting up a ferry route, the transport(s) will automatically pick up units from the ferry's start position, and will drop them off at the ferry end. A purple beacon will be visible for the player at the start of their ferry routes.
Create one by clicking the ferry button, and telling the transport where to go (you can command several in a row, resulting in a curved ferry, to avoid enemy lines, for example. Be careful though, as your transports will usually halt briefly over these connecting points).
Once this is set up, various units can interact with the ferry beacon. If you tell a unit to move to a ferry point, your transports will automatically transport it to the other end. Other transports can be ordered to assist the beacon and will help the original transport to move land units. Land factories can set their rally point to the ferry beacon and their units will move through the ferry system.
When used without interacting with the beacon, ferry will drop the units and then evacuate the transport as fast as possible to its original location. Therefore if the transport does not need to move to a different location (thus requiring a ferry-shift move combination), then a ferry can be a quick and safe alternative to queueing up a Transport command.
Assist[]
You can tell air transports to assist a factory. They will automatically pick up all created units from the factory, and take them to the factory's way point. The transport will wait until it is full, unlike a ferry. This can be useful for creating timed drops or a ghetto gunship, where a maximally loaded transport and surprise is more important than a steady stream of units.
Statistical overview[]
What most sets apart the air transport units is the difference between T1 and T2, which primarily comes with an increase in HP and speed. Although there are differences with factions, particularly at T2, these differences are not as influential.
As rules of thumb, a given tech level transport has enough clamps to carry six units of that equivalent-tech level, and roughly half that of the next tech level up. Higher tech level transports also generally come with more efficient loading of units due to rail layout.
Tech 1[]
The tech 1 air transports are identical in stats; all being lightly armored (500 HP) with a high energy cost of 4800 and speed of 10. They generally have 6 transport clamps but have varied layouts.
Tech 2[]
The tech 2 air transports are more heavily armored (about 1500 HP), faster. They are more varied in capacity, having anywhere from 10 to 16 transport clamps, but additionally are also permitted to carry the ACU. As a side note, at T2 they are lightly armed, but this is usually too weak to be used in any real fashion of combat.
Tech 3[]
Only the UEF have a tech 3 air transport, the Continental:Heavy Air Transport. This transport is very heavily armored, has some decent anti-air weaponry and ground weaponry, and features no less than 28 clamps on 4 rails. It is basically two C14 Star Lifter in one, so even with 28 clamps, it can only carry a maximum of six tech 3 units, with the remaining 4 clamps only able to carry tech 1 units. A full review of the unit is available at UEF T3 Heavy Air Transport.
Factional differences[]

An empty Aeon T1 Chariot.
Regardless of faction, each air transport cost the same and have about the same health for each tech level. Further more, the weapons on the transports are largely irrelevant, making their carrying capacities the only thing that sets them apart. The main differences are:
- Seraphim - The Seraphim transports are by far the best in the game. Not only do they have much larger carrying capacities, with their clamp layout they almost always work at maximum capacities.
- UEF - The UEF transports come second with a slightly above average carrying capacity, and a good clamp layout. Their T2 transport has the highest capacity for T1 units, making it excellent for ghetto gunships.
- Aeon - The Aeon are average. What really sets them apart is their tech 1 Chariot, which can carry three tech 2 units, or a single tech 3 unit and then a tech 2 unit due to its rail layout, making it somewhat more efficient than other factions' transports. On the other hand, their tech 2 Aluminar cannot transport 3 tech 3 units, despite its 12 transport clamps. This makes it more expensive to support the fast Harbinger drop strategy.
- Cybran - The Cybran transports are capable, but in themselves by far the worst transports. They are cursed with not only low carrying capacities, but also a bad clamp layout, preventing them for carrying efficiently. However, the Hoplite and Fire Beetle are T2 units that only take up as much space as a t1 unit and it can gain stealth for itself and its payload by carrying a Deceiver. This can balance it out a bit but this adds complexity, leaving the transport itself lagging behind.
Payload comparison[]
Finally, this table should give you an overview of which transport can carry what. If a unit has space left after carrying a higher tier unit, the details about what else it can carry is provided. For example, 1T3 + 2T1 means the transport can only carry 1 tech 3 unit, and the remaining 2 clamps can only carry 2 tech 1 units, and not 1 tech 2 unit.
| Maximum carrying capacity |
UEF | Cybran | Aeon | Seraphim |
|---|---|---|---|---|
| Tech 1 C-6 Courier | Tech 1 Skyhook | Tech 1 Chariot | Tech 1 Vish | |
| 6 clamps (2 rails) |
6 clamps (2 rails) |
6 clamps (3 rails) |
8 clamps (1 rail) | |
| Tech 1 units Tech 2 units Tech 3 units |
6T1 2T2 + 2T1 1T3 + 2T1 |
6T1 2T2 + 2T1 1T3 + 2T1 |
6T1 3T2 1T3 + 2T1 |
8T1 4T2 1T3 + 2T2 |
| Tech 2 C14 Star Lifter | Tech 2 Dragon Fly | Tech 2 Aluminar | Tech 2 Vishala | |
| 14 clamps (2 rails) |
10 clamps (2 rails) |
12 clamps (3 rails x2) |
16 clamps (2 rail) | |
| Tech 1 units Tech 2 units Tech 3 units |
14T1 6T2 + 2T1 3T3 + 2T1 |
10T1 4T2 + 2T1 2T3 + 2T1 |
12T1 6T2 2T3 + 4T1, 1T3+4T2 |
16T1 8T2 4T3 |
| Tech 3 Continental | ||||
| 28 clamps (2 rails x2) | ||||
| Tech 1 units Tech 2 units Tech 3 units |
28T1 12T2 + 4T1 6T3 + 4T1 | |||
| Tech 2 Stinger | ||||
| 1 clamp | ||||
| Tech 1 units Tech 2 units |
1T1 1T2 | |||
Note: Due to the way the rails fill up, the Aeon Chariot cannot carry one T3 and one T2 unit as one might hope, but can carry one T3 and two T1 units. Similarly, the Aluminar cannot carry 2T3 + 2T2 units, but it can carry 4T1 units in addition to the 2T3; the T1 units will be interleaved with the T3 units in a 2T1-T3-2T1-T3 pattern (from front to back of the Aluminar). The Aluminar restriction on carrying no T2 units if two T3s are loaded was changed in some community mods. The 1T3+4T2 pattern is possible on the stock Aluminar only if you load the 4T2 units first, otherwise the T3 unit will occupy the middle spot instead of the back spot, reducing the number of T2 units that can be still be loaded to just two.
Capacity[]

A Seraphim Vishala with two rails of 8 clamps (lit in yellow) each.
Clamps[]
Depending on the size of the air transport, these can have different amounts of transport clamps. The simple rule is that it takes 1 clamp to carry a tech 1 unit, two clamps to carry a tech 2 unit and 4 clamps to carry a tech 3 unit.
Rails[]
Things get more complicated when you consider that these clamps are layed out in rails. These rails make it possible (or impossible) for higher tier units to be able to use all available clamps, and thus prevent the transport from functioning at full capacity. For example, the UEF C-6 Courier has two rails of 3 clamps each. When carrying tech 2 units, clamps must be on the same rail. Because of this the UEF C-6 Courier can only carry two tech 2 units, because the last two clamps cannot be used (you can fill them with tech1 1 units though). Also, for example, the Aeon Aluminar, with its 12 clamps, can carry 6 tech 2 units, but no more than 2 tech 3 units.
Note to modders: the number of units that can be carried by a transport is primarily dictated by the number of bones in the model for a given type of unit, while the code can limit the maximum number of units (of a given tech level) on the transport. For example, while the UEF Continental can technically only carry 6 tech 3 units, it can be modified (without changing the model) to hold a whopping 10 tech 3 units.
Command units[]
Command units (ACUs and SACUs)are considered weighing as much as tech 3 units (4 clamps). However, tech 1 air transport units cannot carry ACUs. This was probably due to prevent players to over-aggressively bring their commanders in and out of battle. Tech 1 air transport units are fine transporting SACUs though.
Tips[]
Resilience[]
Don't expect your air transport to survive attacks. It usually requires little less than 2 strafes from an interceptor to destroy one, and every unit it carries. Because of this, it is virtually impossible to protect an air transport. Your best chances are either sneaking in, or luring enemy interceptors elsewhere.
If you expect these units to get shot down or are otherwise performing dangerous duties, add them every now and then to the queue of an air factory.
Drops[]
Use transports to surprise the enemy by bypassing defenses or terrain, and attacking from an unexpected angle in order to distract them or otherwise force them to contort the movements of the main army.
This increase of speed also enables flanking and quicker capture of mass deposits, buying time for engineers to set up point defenses.
Ghetto gunship[]

A Continental (with shields down) and an amusing amount of Mech Marines loaded up.
A ghetto gunship is an air transport carrying tech 1 light assault bots, which are the only ones that can fire from a transport. This is usually a cheap and fast way to get a gunship early game. For more information, see the ghetto gunship article.
Campaign[]
Certain maps will require the player to ferry units across water to reach an objective.
